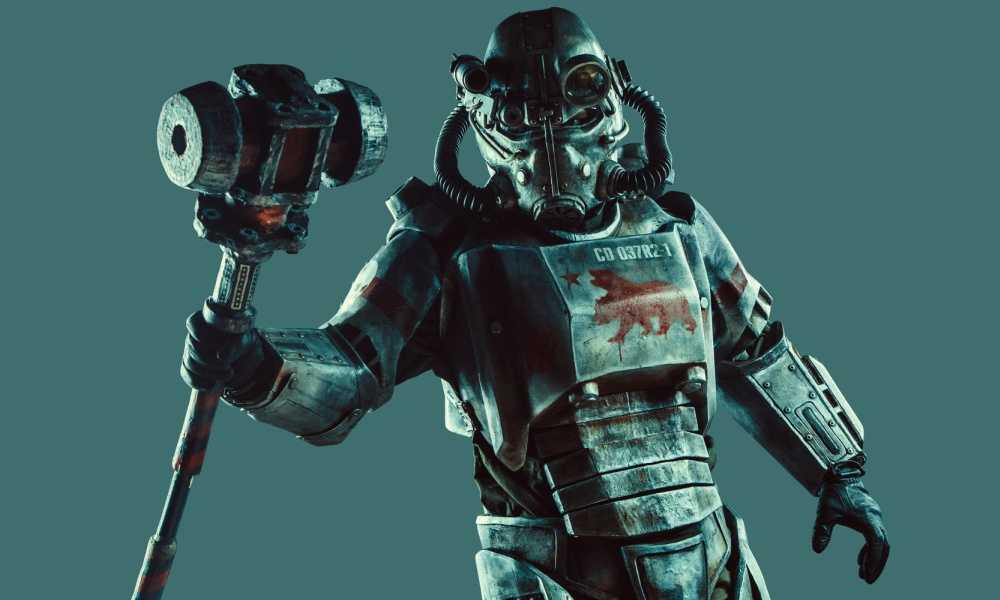
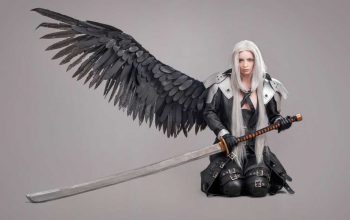
HOW TO MAKE COSPLAY ARMOR

Cosplay armor can be made and constructed if you have what it takes to get it done. When making cosplay armor, you will need to purchase the material that is needed to make it. You will also want to have plenty of time and patience when taking on the task of making your own cosplay armor.
What should you do first?
Find and buy the needed materials
Materials are needed before you can begin designing your own cosplay armor. Knowing what materials you need can be confusing. If you do not want to find and purchase the materials on your own, there is another option that will make the process easier:
You can purchase a kit that has all the materials that you need to begin making the armor. If you go to the site Buyneu, you can get a do-it-yourself kit to make the process easier.
Important materials that you must have to construct cosplay armor of fiberglass:
Bondo putty
The putty comes with two different materials. The first material that you will find is a can of putty that is gray in color. The second material that is needed is a hardening compound that comes in a tube. The hardening material is red in color and has a thick consistency similar to icing for a cupcake.
It may take several attempts when using these two together because they harden faster than what you may expect. If you purchase a Bondo filler, it can be easier to apply, and is less expensive to purchase.
Fiberglass epoxy resin
Epoxy is another name for polyepoxide, a polymer thermosetting material that is shaped by the use of a resonated epoxy that includes the hardening mechanism of polyamine. The material comes in a can that has a gooey texture. The hardener comes in a round tube which is accompanied by a type of cloth to use with it.
When combining the substances, it is a good idea to understand the needed ratio of each substance; you will need to add approximately 3-5 drops of the hardening substance to every 12 tablespoons of the resonated substance. If you can find a fiberglass repair kit, it will have all of the substances and material that you need in a single box.
Other items to consider buying:
- Newspaper or cardboard to keep the work area clean
- A mask to prevent inhaling the toxic fumes
- Sandpaper that is a medium-grit texture
- A sander to make the putty smooth after it has completely dried
- Gloves to protect your skin
- Brushes that can be thrown away after use
- Sticks to put the putty on with; popsicle sticks are a good choice
Construct a base for the cosplay armor
The first thing to do is place the newspaper or cardboard on the work area that you will be using; this will protect the area from the substances and materials that you will be using to make the armor.
If you are unsure of what the base should look like, you can look at how-to videos on the Buyneu site for assistance. The site also contains templates that can guide you on setting up the base.
If you have chosen to buy the Ironman suit kit, you will have access to the files and 3D software that is needed for the complete suit. This will allow you to print off the file or view them for a better understanding of the process.
The Buyneu site will help to make cosplay armor construction easier because it has step-by-step instructions for you to follow.
If you do not want the assistance of the Buyneu website, then you should set aside a few hours for the project.
Separate and look at the pieces of material that you have to work with to construct the cosplay armor. The process of making the cosplay armor can be easier if you find a template, print it out, cut it and put it together to make a display that is 3D.
The 3D version is the replica of what you will be making; it is important to have identified the items’ sizes that you are working with.
Resin application
To begin this process, ensure that your work area is protected and you have put on gloves for added protection. This process can become quite messy at times, so, it is a good idea to have adequate coverage and protection for this process. Follow the directions for better results.
Pour the desired amount of resin and mix in the hardening substance. Grab the disposable brushes to begin using the resin and hardener.
The cloth does not necessarily need to be used to help the hardening process. You may be able to use the liquid resin to reduce the weight and save some of the time during this process.
If you do not want to use the cloth, it is important to work fast and efficiently to get the entire base of the mold covered, and then let it dry for approximately an hour.
If you want to use the cloth during the process, be prepared to have patience and time; it can be a complicated process because the cloth can get stuck on the gloves from the sticky substance. It can also be a challenge to get the cloth into the smaller areas because of your gloves being sticky.
You can press the cloth in the areas that need it, but remember to do this on the inside of the masterpiece. You are not at the delicate stage; pressing the cloth will not harm the areas you’re applying it to.
At this stage, the armor is going to look strange and messy. Let the armor completely dry and later you will be able to smooth down the roughness with the sand paper.
Bondo putty application
The use of Bondo putty and hardener can be tricky. It is important to know the ratio of how much Bondo, you will be using and how quick you can apply it.
It is also important to understand how much of the hardener is needed and how much time it will take you to apply it to the needed areas. Apply it evenly on the armor pieces quickly before it hardens.
When it begins to harden, you will be unable to spread it. Fill in all of the spaces and cracks. If you make a mistake during this process, it is okay; you will have an opportunity to smooth out the rough substances later, and will be able to make it look better. The smoother you can make the putty, the easier it will be to get it smooth later on.
Our Top Pick For Cosplay Costume
Get Your Favorite Hero Armor Now!
Sanding each piece
The appearance of the cosplay armor may be disappointing—do not worry, it will look better once you sand the pieces. They may look rough and unattractive now, but soon it will begin to look like cosplay armor.
When you begin to sand the pieces, be aware that the fumes can be toxic. Put a mask on your face, insert earplugs, and do the sanding in an area that has good ventilation.
To visually see problem areas, it is a good idea to use a primer. The primer will show you where the issue areas are on the masterpiece. Use a sanding block and medium-grit sandpaper. It is best to use circular motions when using the sandpaper. Do this process over sharp edges or runs to make them smooth.
When sanding, do not go too far into the fiberglass material. If you see that you are too close to the fiberglass, move to another area. If you continue sanding the fiberglass, it will create a hole in the material. Sand just enough to make the pieces smooth.
Clean off the excess particles from the pieces. Use another mixture of resin to apply to the exterior to ensure that the fiberglass that may have become exposed is completely coated. Once the resin is completely dry, apply more of the primer to the masterpiece.
The resin helps to cover any of the issues on the pieces. If you notice any rough edges, use the sandpaper to make them smooth. There should be no fiberglass visible once you’re done with this process.
Cosplay armor detailing
The detailing process will help make your armor better, and it can be detailed to the way you want it. This is the process that will allow you to insert holes in the helmet, and remove sections to ensure it perfectly fits your body. When the changes have been made, it will be time for you to begin painting the armor.
Wipe off all of the dust from each individual section of the armor. Add primer and let it completely dry. Once the primer is evenly dried, you can begin to apply the color to the armor. When you start to paint, ensure that you are keeping the spray can approximately 8” from the armor.
If you have it too close to the armor when painting, it will leave streaks and runny paint spots on the cosplay armor. It is important to not be in a hurry, and have patience when painting the armor. You may find it easier to paint each piece instead of an all-over coating.
Tips and Suggestions
- The foot armor—Cut out the foot sections that are flat. You cannot use the foot pieces to walk on but they can be connected to another type of footwear that can be worn.
- Armor arms—Use sponges on each end of the arms. If the arms are slipping, use the cord to attach it to the chest armor section. If you need to use reinforcements, go ahead and do so. You can use cords, foam, Velcro, and sponges as reinforcement. Make sure that these additional parts blend in with the rest of the masterpiece.
- Crotch armor—Use foam that is made out of rubber to line the crotch armor. If you want to keep the back and front sections separate, you can use a belt or strap to connect them at the bottom.
- Chest armor section—It is recommended to insert padding material to the back and shoulders for a comfortable fit. Take a piece of cord and connect it to the front side of the chest and run it around the interior side to the bottom. Connect a loop to the other side of the chest armor. This process is done to help you wear the chest armor properly. You will be able to run the cord across the rib area of your body and insert the cord into the loophole.
- Armor helmet—Use a sponge to insert into the brim, both sides, and on top of the helmet section. If you want to expand your design, use piping to insert for a textured appearance.
- To complete the finished look, wear dark or black clothes under the cosplay armor
You can take a look at the Buyneu site for videos and tutorials, and more creative tips. The videos will give you a better understanding of how each process of the armor should appear. These steps are simple to follow and can easily be constructed.
Is fiberglass confusing?
If this process is too expensive, messy, or take up too much time, there are other options that may work better for you. You can make an armored costume out of foam from a craft store. The foam will not look as real as the fiberglass armor, but it is not heavy and can easily be created.
- Create the armor design. This is not a complicated step and there is no need for paint or details at this point. The main focus should be the shapes and sizes of the pieces being connected. It is a good idea to understand where your armor pieces need to be overlapped in order to properly attach them together. Try to keep the drawing easy to make. If you have too many detailed pieces involved, the structure will not be very sturdy. You can use the Internet to download already sketched pieces to replicate if you prefer.
- Take measurements of the lengths of the arms and legs. Measure the head size and height for an exact fit. The measurements will help you make the proper dimensions of the armor pieces.
- It is recommended to take your measurements and input them into an armor template. It is best to have help with this process. Another person will need to hold up the poster board and draw each dimension of the body parts. This will give you a rough guide of each piece of the armor that you will be making.
- This is the final step of the template—You will need to ensure that your lines are straight and smooth. Put labels on all of your pieces, and on your sketch to eliminate confusion. Now, carefully cut out the pieces to ensure an even cut.
- Take the craft foam and lay it out flat. Trace the cut-out pieces onto the foam. It is best to use a pen and make doubles of the pieces that you need more of. The armor pieces that are bigger will need two of these pieces glued together.
- You will now have the opportunity to connect or emboss the pieces of your armor with a dull knife or pen. It is simpler to draw on a piece of flat foam than when it is put together.
- You will want to take the foam and contour it to the person who will be wearing the armor. The flexible foam can be glued to different sections to create curves. You can shape the foam so that it will stay together without any assistance. Put the foam near heat to make it softer to work with. Another object can be used to help shape the foam to the shape needed.
- Overlap the pieces and glue them together. Regular white glue will work fine.
- It is time to take the armor sections and reinforce them for security. Flip over the connected pieces and cover them with glue. Use fabric that has a gauze texture to smooth over these pieces. Once the sections have completely dried, remove any excess gauze material and cover completely with glue.
- Remember to leave some spaces for the connection of other material such as fabric or leather straps to ensure a proper fit to your body.
- Figure out how you want to connect the armor to your body. It may be easier to use a variety of connections in different ways. You can use Velcro to connect the armor pieces to help anchor it to your body. It is a good idea to wear dark clothing underneath the armor.
- Now that you are ready to attach the armor, you can add accents, color, and details to make it appear more realistic and lifelike.
Finishing touches
If you had embossed the material, you can use fabric paint to bring out the design for a better appearance. This will raise the embossed design and make it more noticeable. Let the fabric paint completely dry overnight.
Make a sealant to cover the foam. The sealant can be made using 2 parts of water, 1 part of glue, and 1 part fabric glue that is flexible. Cover the areas with the sealant and let it dry; it is best to continue to cover the sealant until the air bubbles are gone.
It is time to paint your masterpiece! Use paint that is acrylic, and paint both the back and front pieces of armor. Apply the paint carefully to ensure it is completely even and no streaks appear.
Conclusion
Cosplay armor construction can be an enjoyable process for those who do not mind the mess. If you want to find more creative ideas, you can review the Buyneu.com website for more videos, tutorials, tips, and ideas. You can also take the easy way out and purchase a kit that has everything you need to begin your masterpiece.
Our Top Pick For Cosplay Costume
Get Your Favorite Hero Armor Now!


